
Witch’s Broom Nebula NGC 6960 (7 September 2019)
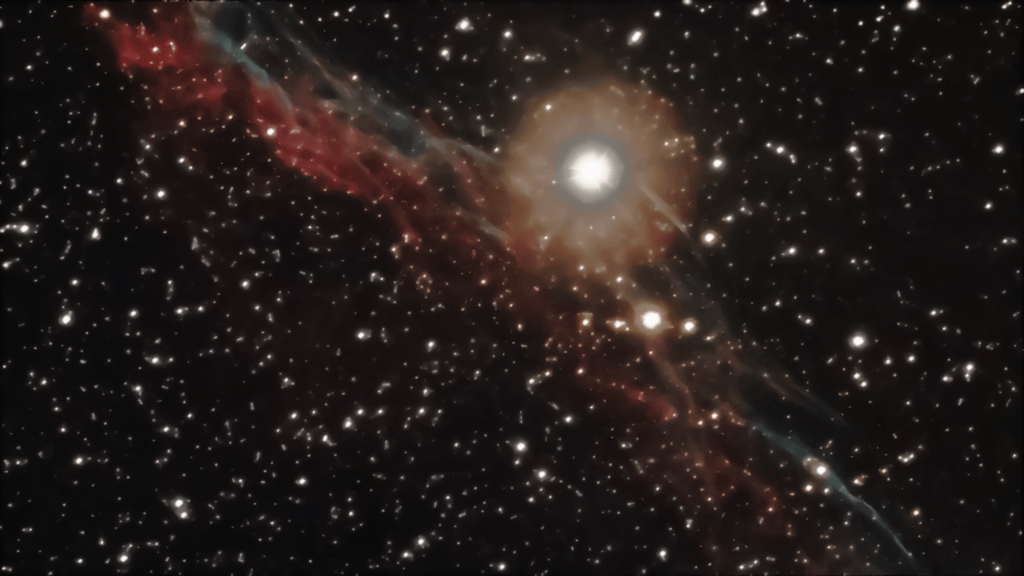
This is my astrophotograph of the Witch’s Broom Nebula. It is part of a much bigger deep space object called the Veil Nebula. About 8,000 years ago, a massive star exploded in a supernova leaving behind an expanding shell of hot gas which is now impacting and exciting other nearby gases to give it its colours. Blue is oxygen and red is hydrogen. This part of that shell on the western side of the Veil Nebula is often called the Witch’s Broom Nebula.
This was quite a difficult photograph, which may account for it not looking very impressive to my eyes (here come the excuses). It is already a very faint object, and in addition: It was windy so the mount kept moving around and the tracking wasn’t great. Clouds also kept passing over so a lot of detail was lost. The moon was out and the sky brightness was high. I should really have narrowband filters to block out the light pollution. I also had a problematic meridian flip: When I stopped the captures to make the meridian flip, SharpCap crashed, and when I rebooted it, I mistakenly re-entered a different exposure time. You’ll see 2 sets of frames with different exposures in the frame details below (with 2 sets of darks)… that’s why. When I first started processing the data I thought I’d got nothing and had lost a night’s sleep for nothing! I salvaged something from it though.
On the positive side, one of the optical artefacts in my photos has been fixed now. The retaining ring for the UVIR window on my camera has grooves in it and these were causing the vertical diffraction spikes. I think the reason I had this problem when using the same camera with my new telescope (having never had it before) is that the higher diameter focuser allows more light to the edges.

I got rid of these diffraction spikes by making a matt black cardboard ring, placing it on top of the retaining ring, and blacking out the interior of the camera nosepiece with a black sharpie to reduce the reflectivity of the anodised aluminium.

The three 120-degree spaced shadows/’inverted lighthouses’ still remain though and are obvious on the brightest star. I think it is caused by the lens spacers. I’m still figuring out if it’s really a problem: I’m told even very high-end refractors have this artefact and that people don’t usually let it bother them as it can be fixed in post-processing. I’m personally struggling to contend with it in post-processing though, but then maybe my skills are not up to it yet. I have, however, seen other astrophotographer’s work with this same telescope and know that these lens spacer diffraction effects are not inevitable. I also have a set of instructions from Explore Scientific that points to shipping screws in the lens cell that need adjusting (more on this in a future post).
Frames
- 63× 120-s light frames with 35× dark frames
- 19× 200-s light frames with 93× dark frames
- 33× flat frames
- 33× dark flat frames
- 106× bias frames
Equipment
- Explore Scientific ED 102 mm apo f/7 refractor
- Sky-Watcher EQ5 PRO SynScan GOTO equatorial mount
- Altair GPCAM3 290C colour camera (with UVIR window fitted)
- Altair 60mm guide scope
- Altair GPCAM2 AR0130 mono guide camera
Software
- SharpCap Pro
- PHD2
- DeepSkyStacker
- Photoshop